Sunday 2 September 2007

Maintenance - Ignition System - 23 August 2007

Not much to say on this one. I got the various bits required delivered from Scandcar. As usual they were quick (ordered from Holland on Monday, received in Yorkshire on Thursday), and the parts were all genuine Volvo or other top brands:
This filter is for the single-carb B18A with the round-then-pointy filter housing:


The Haynes manual is singularly unhelpful on how to remove the lids of the filter housings. In this one, you seem to have to wedge back the surrounding lip bit-by-bit and prise the top out like the lid of a paint tin.

For reference, here's how the plugs connect to the distributor cap:


Also I have the points (part no. 238859) and condensor (part no. 241397) ready to go, but I didn't have the tools or time to get around to them. Sadly the oil filter I ordered was the wrong part, so I'll add the correct part number when I've worked it out.

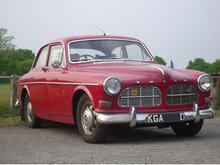
KGA seems to start a litle more readily, and I'm sure the clean air filter will help it breathe more easily. I see there are some twin SU carbs goin on eBay at the moment though...

TODO Improvements - Seat belts

I'm sure the classic three-point linkage in the Amazon is perfectly safe if it's properly adjusted. But it's difficult to adjust, so no-one does it, so in reality it's probably as good as useless. I'm intending to replace the front belts with proper retractable seatbelts, and add a pair to the rear as well.

After much reading around on the 'net, it seems belts from a 240 will do nicely. I trawled through the local and less-local scrapyards and got nowhere though. I suppose I could look again when the fever takes me, but the good people at Scandcar supply new reel belts which'll fit the Amazon.

Retractable front seat belts are currently listed at 75 euro, and retractable rear seat belts at 35 euro. They come with all the necessary bits and bolts, and the Amazon seemingly has anchor points for rear belts. Should be next on the list.

Improvements - Hi Fi - w/e 26 August 2007

The plan to get some hi-fidelity musical reproduction into KGA was meant for a future date, but the long haul up North seemed longer with no entertainment and as I had a week (almost) free, I decided to bring it forward.

I didn't want a plasticky new-fashioned CD player uglying up the dash and encouraging theft where there's currently a period radio, so the plan was a little more involved. I wanted to fit an amplifier somewhere hidden, speakers in the doors, and tweeters up front on the windscreen surround. The amp would end in a 3.5mm adapter, ready for an MP3 player to provide the source.

After much research, I went for some JBL kit which seemed a nice compromise of features and cost:As with most of this car hi-fi separates kit, it seems designed to appeal to the 17-year old who wants to pimp up his Mum's VW Polo. The JBL amp in particular couldn't look less like it belongs in KGA, but it was destined to go under the rear seat, where it would never offend the eyes.

Next day when the thing arrived, I realised I should have researched a good bit more. It's huge and there's no chance of it going under the rear seat. The much-scratched head eventually told me to fit it in the boot, screwed upside-down to the rear parcel shelf, and that's where it went.

It was a lengthy job. All the seats and carpet came out and there was drilling and gromit-fitting needed to route the cables discretely. There's a lot of cable to route in this setup - a hefty power cable goes directly from the battery, through a 30amp fuse into the +12V on the amp:


As there's no head unit to connect to, the "REM" connection on the amp goes to the fuse box via a switch I tucked in under the dash. This is just used to turn the amp on or off and is a much lower rated (5A) cable:


Earth for the amp comes from a hole in the parcel shelf, filed to the bare metal and smeared with Vaseline (inhibits water, conducts electricty, the mechanic's friend).

Then there's speaker cable from the amp into the door where it meets the crossover for the speakers. From there into the door speaker and back through the hinge up to dash for the tweeter. I was without camera for the job, so all we have here are the end results where you can just see some cables taped to the hinge:


(they're safer and more secure than they look).

Fixing the amp to the underside of the parcelshelf proved difficult. Being upside-down in the boot with a drill isn't easy and after much squeezing and twisting and drilling the amp finally revealed that it wasn't going to fit. Two bolts secured it nicely at the back, but then it stuck out too much at the front to bolt it in.

I'd stuck the speaker crossovers (small, light plastic boxes about 6 inches by 4) to the inside of the door panel using heavyweight Velcro, so I tried the same with the amp. To my surprise it held very well, and I bolted it at the back and left it in place. After one particularly hot day the glue holding the velcro strips to the parcel shelf gave way and left the amp hanging... Currently there are cable ties holding it at the front while I think of a new plan:


With the amp and cables in place, the rest wasn't too hard. Taking the door panels off is reasonably straightforward (careful application of a steak knife will release the circlips holding the door release and window winder), and the 5 1/4" speaker fits nicely underneath and to the rear of the door handle:


Note that the gap in the door panel at this point won't really allow for a larger speaker, and you need to be careful with positioning. Too far towards the rear of the car and the powerful magnet in the speaker will attract the chain of the winding mechanism, which will stop you lowering the window.

Top tip: putting the circlip for the window and door handle back on is a much trickier business than removal. I found you can fit the circlip in place on the handle (it'll go about halfway home), push the handle on as far as it will go and slide a credit card up to the circlip. A small nudge will push it into place and save you hours of grief. God knows how the factory boys managed it before the Age of Credit.

I'd intended to drill out the windscreen surrounds to fit the tweeters flush, but this would have been a close call requiring some precision drilling. For the moment I've fixed them on top of the surround (with double-sided tape), with small holes taking the cables away unseen. This looks okay and will do for the time being, although I'd like to sink them properly at some point.


The amp comes with a few settings you can twiddle to set the sensitivity of the source and beef up the bass response. A little tweaking was needed and one speaker had to come out to have its connections tightened, but once in place the setup sounded great.

A job that took the best part of four days in all, although that included some thorough cleaning of seats and carpets and a minor service. I'm very happy with the result though, which sounds clear and detailed. Just need to reduce the road noise...

"Dead as a doornail, proverbially" - 18 August 2007

It was a big day for Kilo Golf Alpha, who would be hauling us North 400 miles to Yorkshire, via the Western Lake District. The plan was a week off work for some familial house-sitting and - as the house comes with garage - some solid time spent tinkering.

There were complications pulling out of a supermarket where we'd stocked up with supplies for the journey. Steering suddenly became very stiff as I reversed out of parking space and needed some serious wrenching to get the wheel around. I should have stopped there and examined things, but the steering lightened up almost immediately, so we headed on our blissful way with a tankful of petrol.

I hadn't realised that the stiffness was caused by the wiring loom to the new alternator getting wrapped around the steering column. The wrenching action pulled both leads out of their connections and left us without charge. The red light which should have told us there was no charge didn't, because the cable which powers it had been wrenched out of the alternator...

We drove merrily unawares up the M25 and M6, with no noticeable problems. Weather was foul though, and we had lights, wipers and heater going full blast. Eventually - some 200 miles in - the wipers started getting slower and slower, so the heater and light came off, but the wipers still slowed.

We pulled in at the next services where I found the dangling wires. Some emergency electrical squeezing got everything back together but the battery was totally drained. A passer-by noticed our plight, offered his very kind assistance and with a shove got us going again.

After another hour we needed to stop for petrol, but the fast motorway run had charged the battery and all was well. Many thanks to our unknown friend whose help was very, very much appreciated.

Monday 9 July 2007

TODO Maintenance - Ignition System

Strangely, after the alternator upgrade, KGA has become a bit hesitant to start from cold. It turns over strongly enough and is happy to keep on turning, but it doesn't catch until the third or fourth attempt.

So new plugs, points, distributor cap and leads need purchasing, fitting and adjusting.

Tuesday 3 July 2007

Improvements - Charging System - 23 June 2007

I settled on the 65 amp alternator from Scandcar. Only the 35 amp version is listed as suitable for a '66 121, but they confirmed that the 65 amp version would fit. They were right, but it was a very close call...

The amp is Scandcar part number 79910211 , but (despite the picture) you need to order the bracket separately, number 419417. It all came within a few days of ordering, along with a new fan belt and thermostat.

Instructions came in Dutch... But with the help of a chum who speaks Afrikaans ,we got as far as "thick black wire to B+" and "thin red wire to D+", which corresponded to the wires going in to the old voltage regulator and the terminal names on the new alt.

The job basically involves disconnecting and removing the dynamo, unbolting the original mounting bracket, fitting the replacement mounting bracket, bolting on the alternator, unplugging the two wires going into the voltage regulator and connecting them to the alt. The alt has its own regulator, so the old one can be removed - which I did once the alt had proved itself.

This is how the connections looked beforehand:


Removing the dynamo and the spare wires was a five-minute job, and the new bracket went on without any issues:


But after that things got trickier. The 65 amp unit is a very tight fit and there's not much room for adjustment to get the fan belt on or make it taught. Initially I could only get the old slack belt to fit, but there wasn't room to tighten it without the alt fouling the steering box. The shrieking noise wasn't much fun, so it came off and the new belt went on.

After much heaving, groaning and head-scratching, the very last trick got the new belt on. It involved loosening the new bracket so it hung off and could be freely moved, putting the belt on the alt and bolting the alt to the bracket. Then gradually tightening the bracket until it was securely in place, bringing the alt into line and the belt nice and tight:


The final issue was bolting the alt to the top adjustment bracket. It wouldn't fit around the edge of the alt so I've fitted a secondary bracket in between. This holds solid and allows free adjustment and should by no means be considered a bodge:


And KGA is far far better for it. The old regulator can't have been up to much - with the alt the engine runs more smoothly and the fuel gauge fluctuates less wildly. The charging warning light never comes on, even at idle, and the indicators still work even with the lights, wipers and heater on.

After a trouble-free 200 mile round-trip to Silverstone I checked and tightened all the new fixings and connections. The alt's been fine and comes as a highly recommended enhancement. But unless you really need the extra power, a 35A unit would be a far easier option.

Wednesday 23 May 2007

Farewell, Sweet Prince -10 May 2005

With KGA performing faultlessly and the Rover gathering dust, it was time to tempt fate and get rid of the backup vehicle.

As it had started pouring oil from the engine, overheating on small journeys and refusing to start without being coaxed, the Rover went onto eBay with no reserve and £1 to start:

http://cgi.ebay.co.uk/ws/eBayISAPI.dll?ViewItem&ih=007&sspagename=STRK%3AMESO%3AIT&viewitem=&item=170110829222&rd=1&rd=1

Despite the frighteningly honest listing, it went on 10th May and was picked up on the 12th. I was happy with the price and the buyer (a Rover mechanic) was happy with the car. Great success.

Since then it's just been me and KGA. And my bicycle. And I'll be bringing my Vespa out of retirement, just in case.

TODO Improvements - Overdrive

An overdrive gearbox was an option on Amazons and came as standard on the souped-up 123GT. KGA doesn't have one, but it would make motorway driving a smoother experience.

For the uninitiated, overdrive was the sixties' answer to fifth gear. But a bit cleverer, so it could usually be engaged in third or fourth gear, to ratchet things up to an equivalent of 3½ or 4½ and take some strain off the engine.

Hopefully it won't be too hard to find a box with an overdrive unit. The plan is to get hold of one, get it reconditioned, then fit it and replace the clutch while I'm at it.

Not in the near future though.

TODO Maintenance - Cooling System

KGA has the "standard" modification common to most classic cars - the temperature sender gauge which starts up the electric fan has been replaced with a switch.

So the driver decides when the engine's too hot, and often forgets to turn the fan off after parking. Leading to another battery charge.

Even with the electric fan, global warming is taking its toll and hotter days see KGA cruising around England with the fan switched on, the heater on full and all windows wound down to try and moderate the sweating of the inhabitants.

Hopefully the situation can be improved with a run on BARS flush, removal of the radiator and reverse-flushing it, and some new cooling hoses.

Then I may be able to put back the thermostat which a previous owner removed many summers ago.

Tuesday 22 May 2007

TODO Improvements - Charging System

The dynamo in the Amazon is rubbish, and was from new. It produces no charge at idle, and precious little at higher revs. I find myself having to lump the aged battery out and charge it once a fortnight to make sure KGA starts.

There are plenty of ideas around for upgrading to a modern alternator, as on the Volvo Owners' forum here:

http://www.volvoforums.org.uk/showthread.php?t=36163

But it narrows down to:

1) the SWEM alternator upgrade kit - which is highly regarded but on this side of the water, the recommended AC Delco alt is hard to come by;

2) the Scandcar alternator replacment - on the same continent and has everything you need. According to the website only the 35A version is suitable for a '66 Amazon, but I've mailed them and they confirm the 65A model will be fine.

I'll be going for the latter, when time and budget permits.